Before Comodo (now Sectigo) Certificate Authority can issue your certificate, they have to verify your domain ownership. This process is called Domain Control Validation (DCV). You can find general requirements for domain validation here. This article describesthe the DCV process for GoDaddy domains.
In order to change the selected DCV method or force HTTP/DNS check, use Comodo Order Status Checker or contact SSLs.com Support.
Email-based Validation
To complete it, you will need to receive an email sent to one of the domain-associated email addresses. A choice of email addresses is represented by the generic emails:
admin@example.com
administrator@example.com
postmaster@example.com
webmaster@example.com
hostmaster@example.com
In the email there’ll be a verification code and a link. Follow the link and paste the code to complete the domain validation process.
HTTP-based Validation
This requires you to upload a certain text file onto your web server or control panel. This method is not available for Wildcard SSLs. You can download the file from your SSLs.com account. Then put it into a specific directory of your website as follows:
- Open document root directory for the domain name.
- Create a temporary new folder called: .well-known.
- Under that folder, create another new folder called: pki-validation.
- Upload your .txt file to this folder.
Eventually, the validation file should become accessible via the following URL: http://your(sub)domain.com/.well-known/pki-validation/<filename.txt>.
If you have a Single-domain SSL, then the validation file must also be available via http://www.your(sub)domain.com/.well-known/pki-validation/<filename.txt>.
DNS-based validation
You can use the DNS-based method if your domain is using GoDaddy Nameservers. This method requires you to create a CNAME entry in your domain’s DNS records.
Add the validation CNAME to the DNS zone file following the below instructions:
1. Log in to your GoDaddy account and open My Products.
2. Choose your domain from the list.
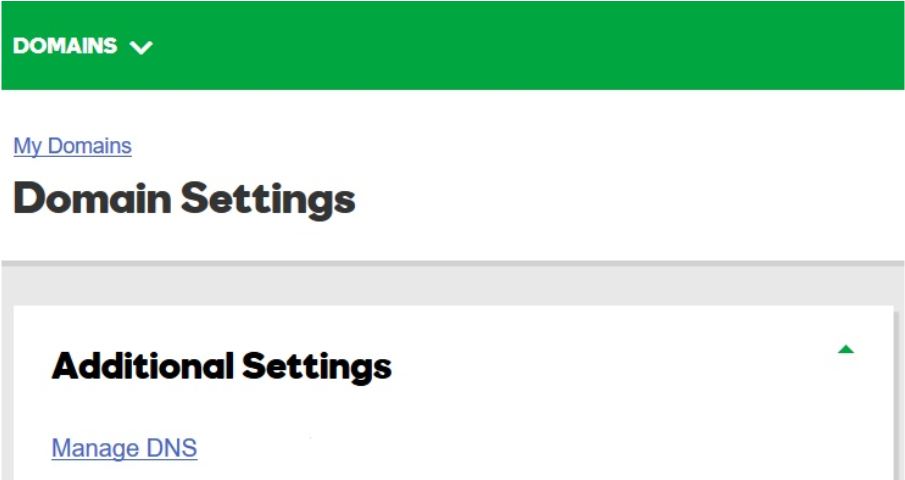
3. Scroll down to the Additional Settings section and select Manage DNS.

4. On the DNS management page, at the bottom of the Records section, click Add.
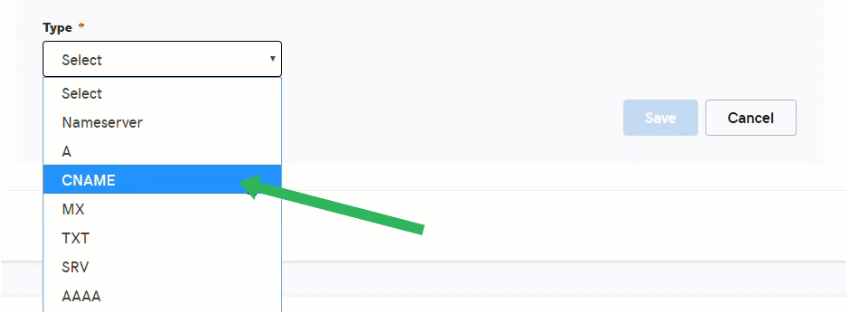
5. Select CNAME from the Type dropdown.

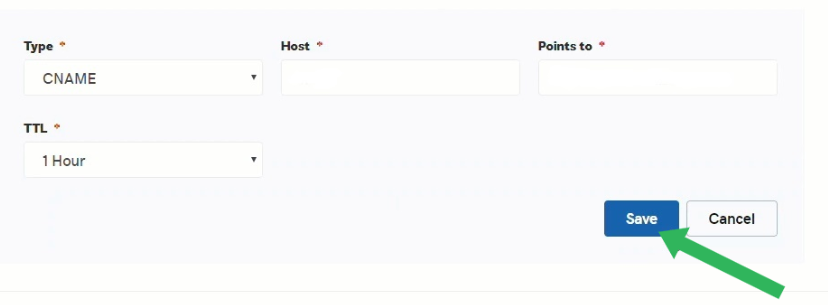
6. Fill in the ‘Host’ and ‘Points to’ fields and click Save to complete the process.

How long does it take? Usually, it takes up to 15 minutes to complete domain control validation.